Frequently Asked Question
Introduction
Microsoft 365 / Office 2021 Cloud Fonts are only available in Office programs … that’s the official line unless you know the trick to make the fonts available in other Windows or Mac apps. This trick is sometimes needed for compatibility with other programs, such as Adobe Distiller (used when printing to PDFs).
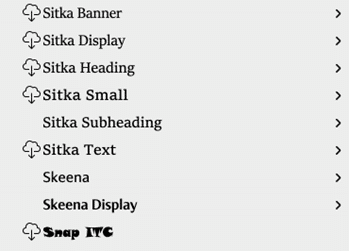
You might have seen the little cloud arrow icon in font download lists. This indicates a font is a cloud font that has not been downloaded to your computer. Cloud fonts can be selected and installed for Word, Excel, PowerPoint, Outlook and Publisher.
Disclaimer
Making an Office cloud font available outside of the Microsoft Office apps is almost certainly beyond what is allowed in the applicable terms and conditions.
Cloud fonts are hidden but not so special
The Office cloud fonts are installed in a special way so they only appear in Microsoft Office font selectors. Unlike all other fonts which are installed into Windows or Mac operating systems and visible to all programs.
Office does this font hiding trick by saving the cloud fonts to a special folder. But otherwise, cloud fonts are not anything special. Cloud fonts are OpenType/TrueType fonts which are a common format for Windows and Mac.
To make a cloud font accessible to other programs, all you need to do is track down the special folder and install the font to the operating system.
Instructions for macOS
We will find the font in its special location, then install it into the operating system.
Go to this folder:
/{username}/Library/Group Containers/UBF8T346G9.Office/FontCache/4/CloudFonts
To do this, open Finder, select the Go menu > Home, then follow the directory structure between the slashes down to the CloudFonts folder

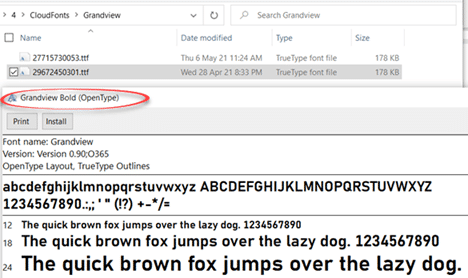
Open the folder for the font you want to install fully. You’ll see .ttf TrueType font files but with numbers instead of their usual names.

To see the full name of the font (e.g. Regular, Bold, Italic etc), right-click on a .TTF file and choose ‘Open’ (i.e. MacOS Font Book app). The full name of the font is in the title bar, plus there’s a preview look at the font.

There’s an Install Font button in the Preview window. The font is now in Font Book app, just like any other installed font.

Instructions for Windows
In Windows, go to this folder:
C:\Users\{username}\AppData\Local\Microsoft\FontCache\4\CloudFonts\
In Explorer go to Drive C, then the \Users folder. Select your user account folder. Then follow the rest of the folders as shown. Can’t see the ‘AppData’ folder? Go to View | Show/hide | Hidden items

There’s a set of folders, one for each installed Cloud Font. Select a folder for the font you want to install fully. You’ll see .ttf TrueType font files but with numbers instead of their usual names.

To see the full name of the font (e.g. Regular, Bold, Italic etc), right-click on a .TTF file and choose ‘Preview’. The full name of the font is in the title bar, plus there’s a preview look at the font.
Install the font normally. The easiest way is to right-click the .TTF file and choose Install from the context menu. Or, you can open the font, and in the preview window, click the Install button.